




Technical Knowledge & Industry Blog
Stay informed with technical insights, testing standards, and environmental chamber innovations from SFTYE Equipment Co., Ltd.
How to Choose a Three-Zone Thermal Shock Test Chamber?
Table of Contents
- What Is a Three-Zone Thermal Shock Test Chamber?
- How Does a Three-Zone Thermal Shock Test Chamber Work?
- Which Test Requirements Define the Chamber Configuration?
- How to Compare Performance, Capacity, and Control Features?
- What Safety, Maintenance, and Compliance Factors Should Be Checked?
- FAQS
- Conclusion
- Related Posts
Choosing a Three-Zone Thermal Shock Test Chamber is not simply a matter of selecting the widest temperature range. The right chamber must reproduce severe, repeatable transitions without damaging the test method itself. Imagine a sealed electronics module moving from a hot zone at 150°C to a cold zone at -65°C. Its housing contracts. Moisture may condense. Internal solder joints experience hidden stress.
Dr. John D. Anderson, an environmental testing specialist, offers a useful principle: “A fast temperature change matters only when the result remains repeatable.” That idea should guide every purchasing decision. Ask how quickly the basket transfers between zones. Check the recovery time after each transfer. Review temperature uniformity, sensor placement, basket capacity, and control-system stability. A dramatic specification can look impressive. It may still be impractical.
A reliable Three-Zone Thermal Shock Test Chamber should also support recognized testing procedures, traceable calibration, safety interlocks, and accessible maintenance. Examine the refrigeration system, heater design, insulation, and data-recording functions. Do not overlook the sample size. A crowded basket can restrict airflow and produce misleading results.
Experience often exposes small weaknesses. Door seals may harden. Transfer mechanisms may vibrate. Condensation may appear where operators did not expect it. These details affect confidence in the final report. I would not choose a chamber based only on brochure values. Talk with the manufacturer about actual workloads, specimen materials, transfer frequency, and service response. The perfect choice on paper can fail on the factory floor. Reflect on that before approving the purchase.
What Is a Three-Zone Thermal Shock Test Chamber?
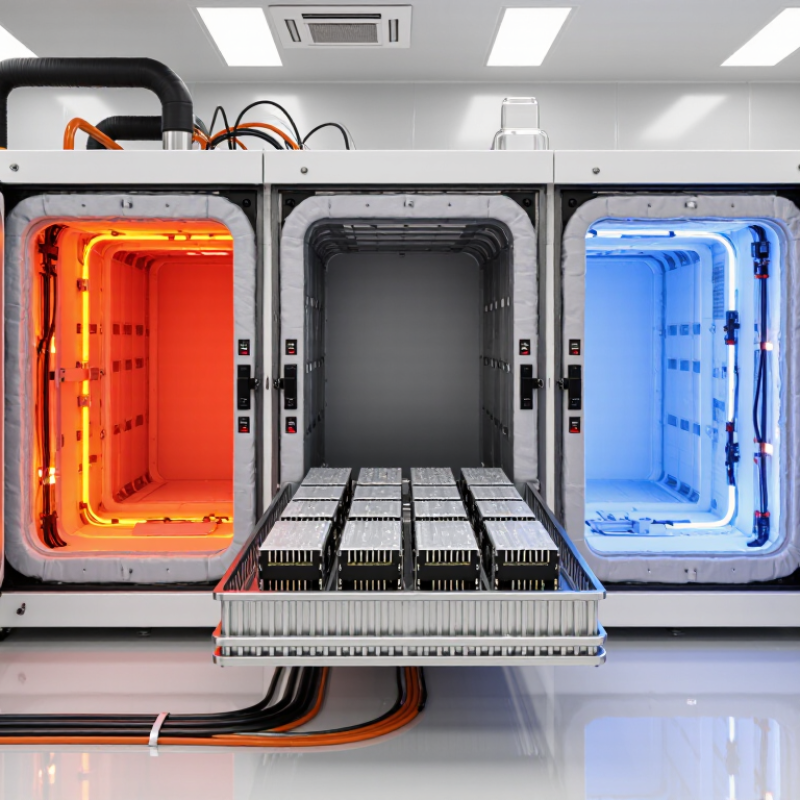
A three-zone thermal shock test chamber is a laboratory system for exposing products to sudden temperature changes. It contains hot, ambient, and cold zones. A mechanical transfer system moves the test specimen between them within seconds. This creates sharper thermal transitions than a conventional cycling chamber.
The hot zone may reach high temperatures, while the cold zone produces controlled low-temperature conditions. The ambient zone supports stabilization and inspection between exposures. Engineers use this equipment to evaluate solder joints, seals, plastics, batteries, sensors, and other components. During testing, thermocouples record the specimen temperature, not only the chamber temperature. This detail matters. A programmed cycle can look correct while the product responds slowly. Test results also depend on dwell time, transfer time, specimen mass, and loading arrangement. In practice, small setup errors can change the stress level. That is worth reviewing before trusting the data.
Tips: Confirm the required temperature range and transfer time first. Check whether the chamber maintains uniform conditions around the sample. Leave enough space for airflow. Calibrate sensors on schedule. Record recovery time after each transfer. Choose test settings from the product specification or applicable standard, rather than copying a familiar program. One overlooked issue is condensation. If moisture forms during a transition, the failure may involve humidity, not thermal shock alone. A careful pretest inspection can reveal this difference.
How Does a Three-Zone Thermal Shock Test Chamber Work?
A three-zone thermal shock test chamber uses separate hot, ambient, and cold compartments. A movable basket carries the specimen between them. This design creates rapid temperature changes without manually opening doors. The hot zone may reach 150°C, while the cold zone can fall below -60°C, depending on the selected specification. The ambient zone supports stabilization, inspection, or controlled recovery.
The mechanism is simple, but temperature control is not. Heaters, compressors, dampers, and sensors work together to maintain each zone. According to IEC 60068-2-14:2023, thermal shock severity depends on temperature limits, exposure time, and transfer conditions. A chamber should therefore match the test method, not only its advertised temperature range. Small details matter.
MIL-STD-202H, Method 107 commonly uses transfer targets near 10 seconds and dwell periods around 15 minutes. These values help reveal cracked solder joints, seal failures, and material delamination. In practice, technicians should verify the actual specimen temperature, not trust air temperature alone. A heavy aluminum fixture may remain cold while the chamber display looks correct.
The ambient zone can improve repeatability, yet it may also lengthen the complete cycle. That trade-off is easy to overlook. Select a chamber with calibrated sensors, documented recovery time, and uniformity data from independent testing. The test plan should also define specimen mass, loading position, and transfer timing. Otherwise, impressive specifications can produce weak evidence. Perhaps this is the uncomfortable part: a faster chamber is not always a better chamber.
Which Test Requirements Define the Chamber Configuration?
How to Choose a Three-Zone Thermal Shock Test Chamber?
Which Test Requirements Define the Chamber Configuration?
The test profile should define the chamber, not the other way around. Identify the required hot and cold temperatures, transfer speed, dwell time, and cycle count. A three-zone chamber usually includes hot, cold, and ambient sections. The ambient zone can stabilize specimens during transfer, reducing unwanted thermal disturbance. However, not every product needs this feature. Adding it without a clear test reason may increase cost and maintenance.
Sample size and mass directly affect chamber performance. A large metal assembly needs more recovery power than a small electronic module. Specify the maximum load, fixture material, and spacing between specimens. Check whether the chamber can meet temperature limits with the real test load, not an empty basket. This detail is often overlooked. It should not be.
Tips: Request test data under your actual load conditions. Confirm transfer time at both temperature extremes. Ask about sensor placement, calibration intervals, door opening limits, and condensation control. Review the control system’s cycle recording before approval. A chamber may reach the target temperature quickly, yet fail to maintain uniformity around dense specimens. That difference matters. Also consider factory space, electrical capacity, noise, drainage, and operator access. If requirements remain uncertain, begin with a written test matrix and challenge every assumption. Perfect specifications are rare, and early revisions are usually cheaper than later modifications.
How to Choose a Three-Zone Thermal Shock Test Chamber?
The required cold temperature, hot temperature, dwell time, and transfer sequence determine the chamber configuration. The illustrative profile below shows how a three-zone chamber can maintain separate cold, ambient, and hot conditions during a thermal shock cycle.
This example uses a cold setpoint of −55 °C, an ambient zone of 23 °C, and a hot setpoint of 125 °C. Confirm the required temperature range, specimen size, transfer time, recovery performance, and applicable test method before selecting chamber volume and zone capacity.
How to Compare Performance, Capacity, and Control Features?
How to Choose a Three-Zone Thermal Shock Test Chamber?
Performance, capacity, and control features deserve equal attention. A three-zone chamber should move specimens between hot, ambient, and cold zones quickly. IEC 60068-2-14 emphasizes controlled temperature transitions and specimen stabilization. Compare transfer time, temperature recovery, uniformity, and overshoot.
A fast transfer rating can look impressive, but loaded performance may differ. Ask for test data using your actual specimen mass and fixtures.
The 2024 IEA Global EV Outlook forecast more than 17 million electric-car sales in 2024. This growth increases demand for repeatable battery and electronic component validation.
Capacity selection must include product size, rack spacing, airflow, and heat load. More internal volume is not automatically better. An oversized chamber may recover slowly and consume more energy.
Control systems should provide independent zone monitoring, programmable profiles, alarm history, calibration support, and exportable records. Data logging matters during failure analysis.
Tips:
Request a witnessed test with your real load. Check recovery after door opening. Review calibration certificates and sensor locations. Confirm whether published specifications use empty-chamber conditions. That detail is easy to miss.
In practice, no chamber performs perfectly under every load. A small compromise in recovery time may be acceptable, but unexplained temperature drift is not.
Compare uncertainty, maintenance access, and service response, not only purchase price. Industry reports often highlight capacity and market growth, while laboratory decisions depend on measured repeatability. That gap deserves careful review.
What Safety, Maintenance, and Compliance Factors Should Be Checked?
How to Choose a Three-Zone Thermal Shock Test Chamber?
Safety checks should reflect real operating conditions, not only a supplier’s brochure. I have found that door interlocks, emergency stops, and over-temperature alarms deserve hands-on testing. Confirm that the chamber stops heating or cooling after a sensor failure. Check electrical grounding, pressure protection, and adequate room ventilation. The transfer mechanism must move smoothly, without trapping hands or damaging test fixtures. Small gaps can become serious hazards.
Maintenance affects temperature stability and test credibility. Inspect door seals, fans, filters, drains, and heat exchangers at defined intervals. Look for frost, unusual vibration, oil marks, or slow zone recovery. These signs may indicate airflow or refrigeration problems. Keep calibration records for temperature sensors and controllers. Calibration should be traceable to recognized references. A clean chamber is easier to trust. Still, cleaning alone cannot correct a drifting sensor. Preventive schedules should include spare parts, technician qualifications, and documented corrective actions.
Compliance requires more than displaying a certificate. Match the chamber’s functions with the selected test method, customer specification, and applicable local requirements. Verify temperature range, transition time, uniformity, recovery time, and maximum specimen load during acceptance testing. Request electrical diagrams, risk assessments, operating instructions, and service history. Independent calibration reports add useful evidence, but they do not replace performance verification. I would also review refrigerant information and disposal procedures with a qualified specialist. Check every record. Even experienced teams sometimes overlook software access controls or outdated procedures.
FAQS
It moves specimens between hot, ambient, and cold zones within seconds. This creates sudden temperature changes. The ambient zone supports stabilization and inspection.
Engineers test solder joints, seals, plastics, batteries, sensors, and other components. Small assemblies may respond differently from large ones. Specimen mass matters.
Chamber air can reach the programmed temperature before the product does. Thermocouples reveal the actual specimen response. Otherwise, test data may look correct but mislead you.
Transfer time, dwell time, specimen mass, airflow, and loading arrangement all matter. Recovery time also deserves attention. Small setup errors can change the stress level.
Check product size, rack spacing, airflow, and heat load. More space is not always better. An oversized chamber may recover slowly and consume more energy.
Look for independent zone monitoring, programmable profiles, alarm history, calibration support, and exportable records. Data logging helps during failure analysis. Fancy screens are not enough.
Test door interlocks, emergency stops, and over-temperature alarms by hand. Confirm heating or cooling stops after sensor failure. Inspect grounding, pressure protection, ventilation, and transfer movement.
Moisture may form during temperature transitions. A failure could involve humidity, not thermal shock alone. Inspect the specimen before and after testing.
Inspect seals, fans, filters, drains, and heat exchangers regularly. Watch for frost, vibration, oil marks, or slow recovery. Cleaning helps, but it cannot fix a drifting sensor.
Use the real specimen mass and fixtures during a witnessed test. Check transition time, uniformity, recovery, maximum load, and temperature range. Published empty-chamber data may not represent real use.
Conclusion
Choosing a Three-Zone Thermal Shock Test Chamber requires more than comparing temperature ranges. This chamber uses separate hot, cold, and test zones to transfer products rapidly between extreme environments while minimizing transition time. Understanding its operating cycle helps users evaluate whether the equipment can reproduce the required thermal stresses accurately and consistently.
The correct configuration should be defined by test standards, temperature limits, transition speed, sample size, load weight, and cycle frequency. Buyers should also compare heating and cooling performance, chamber capacity, airflow uniformity, sensor accuracy, programming functions, data recording, and control-system usability. Safety features, such as alarms, over-temperature protection, door interlocks, and emergency shutdown, are equally important. In addition, check maintenance access, component durability, calibration procedures, energy use, documentation, and applicable compliance requirements. A well-selected chamber should provide reliable testing, stable operation, convenient upkeep, and sufficient flexibility for future testing needs.

Blog Tags: